

Settings Overview
Every option for Smart Product Gallery lives on one screen. This page shows you how that screen is organized, how saving works, and what the free plugin shows differently.
Smart Product Gallery doesn't add options to each product. One set of settings styles the gallery on every product in your store. Change the layout once and every product page follows. It's the fastest way to get a consistent catalog. The trade-off is that you can't give one product a different layout from the rest.
Opening the settings
In your WordPress admin, go to FluentCart → Product Gallery. The direct address is:
/wp-admin/admin.php?page=smart-product-galleryYou'll also find a Settings link under the plugin's name on the Plugins screen.
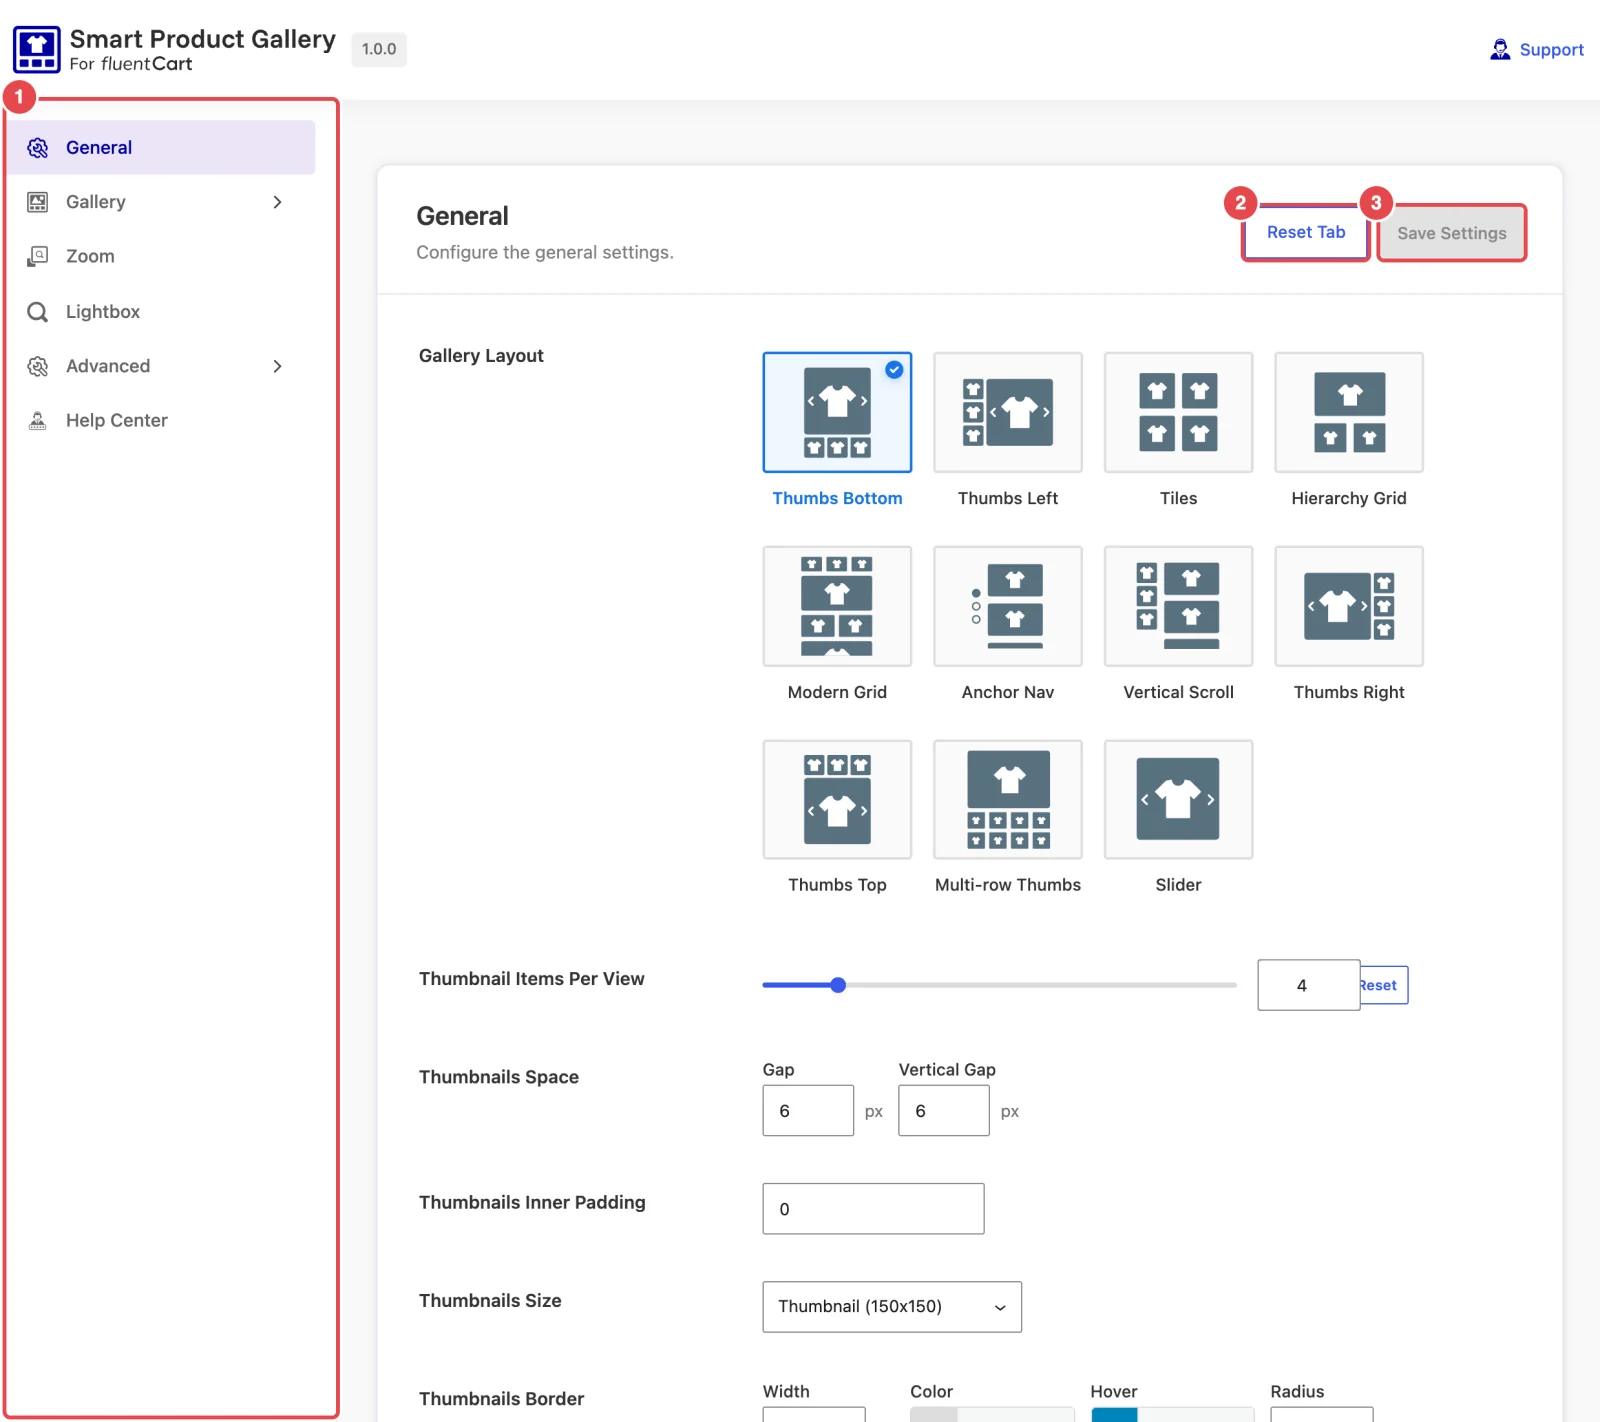
The screen has three parts:
- The tab sidebar on the left: General, Gallery, Zoom, Lightbox, Advanced and Help Center. Gallery and Advanced open into sub-tabs.
- The panel in the middle, which shows the fields for the selected tab.
- Reset Tab and Save Settings at the top of the panel. Save Settings appears again at the bottom.
| Tab | What it controls | Reference |
|---|---|---|
| General | The layout, thumbnails, grid columns, captions and which images appear | General |
| Gallery | The slider, arrows and dots, thumbnail arrows, image size and the Show More button | Gallery Slider, Navigation & Pagination, Thumbnails Navigation, Product Image, Show More Button |
| Zoom | Hover zoom on the main image | Zoom |
| Lightbox | The full-screen viewer that opens when a shopper clicks an image | Lightbox |
| Advanced | The shortcode, your own CSS and the license key | Advanced, License Key |
| Help Center | A welcome video and links to support | Help Center |
Some fields only appear for some layouts
The panel hides anything that doesn't apply to the layout you've picked. If you choose Tiles, for example, there's no slider and no thumbnail strip. So the Gallery Slider, Navigation & Pagination and Thumbnails Navigation sub-tabs disappear from the sidebar.
If you can't find a setting, check the layout first. Each settings page notes which layouts hide its fields.
Saving your changes
Nothing changes on your store until you click Save Settings. Until you edit something, the button is greyed out. While it works it reads Saving..., and when it's done you'll see "Settings saved successfully".
You can move between tabs before you save. One click on Save Settings saves the changes on every tab. Closing or reloading the page before you save throws those edits away, and you won't get a warning first.
Check your work on a real product
Keep a product page open in another browser tab. After you save, reload it to see the change. That's the quickest way to judge a color or a gap.
Resetting a tab
Reset Tab puts every setting on the current tab back to its default. You'll be asked to confirm, because a reset can't be undone. Then you'll see "Tab settings reset to defaults".
A reset only touches the tab you're on:
- On General, it resets everything on the General tab, including the layout.
- On any Gallery sub-tab, it resets all five Gallery sub-tabs together: slider, arrows and dots, thumbnail arrows, product image and the Show More button.
- On Advanced, it clears Additional CSS only. Your license key isn't touched.
There's no "reset everything" button. To start completely fresh, reset each tab in turn.
Linking straight to a tab
Each tab and sub-tab has its own address. Bookmark one, or send it to a colleague, and the screen opens right where you need it:
| Tab | Add this to the settings URL |
|---|---|
| General | #general |
| Gallery → Gallery Slider | #gallery/gallery_slider |
| Gallery → Navigation & Pagination | #gallery/navigation_pagination |
| Gallery → Thumbnails Navigation | #gallery/thumbnails_navigation |
| Gallery → Product Image | #gallery/product_image |
| Gallery → Show More Button | #gallery/show_more_button |
| Zoom | #zoom |
| Lightbox | #lightbox |
| Advanced → Advanced Controls | #advanced/advanced_controls |
| Advanced → Additional CSS | #advanced/additional_css |
| Advanced → License Key | #advanced/license_key |
| Help Center | #help_center |
For example, admin.php?page=smart-product-gallery#zoom opens the Zoom tab. The screen also remembers the last tab you used.
In the free plugin
The free Smart Product Gallery for FluentCart uses the same screen at the same address, with fewer options:
- There's no Lightbox tab, no Help Center tab and no License Key sub-tab.
- Gallery Layout offers two layouts: Thumbs Bottom and Thumbs Top.
- Some options carry a Pro tag. You can see them, but you can't select them. Other Pro options aren't shown at all.
Each settings page in this guide notes what the free plugin locks on that tab. If you upgrade to Pro, your saved settings carry over, because both plugins store them in the same place. See Free and Pro.
Where to go next
- General settings: start with the layout.
- Layouts Overview: compare the eleven layouts before you pick one.
- Quick Start: the shortest route to a working gallery.